Showing posts with label pixels. Show all posts

Wednesday, April 21, 2010

foregoing.

i've chosen, deliberately, to forego all the 'pretty'. and focus on what really matters to ME.

day 6 details surface & event

remember this? a wild, unashamed confession that something i once truly loved was slowly leaving me for something else? scrapbooking is no longer my go-to...& photography is quickly taking its place....

and this is why:


i want to remember. i want to throw aside the inhibitions, expectations of perfection, self-made thoughts that pictures need to be pretty with sparkles. and just do it.

i'll toast to that...


Saturday, April 03, 2010

13 Ways to Better Photos...Day 13 {publish}

As I’ve looked back through my scrapbook pages, I realize that my favorites are the ones that TELL A STORY. The photo’s are important, yes--& they tell a story of their own…but sometimes words are a much more powerful weapon! I know that I’d like to know how my great-grandmother wrote…& I have no documentations of her handwriting! I’d love to know what she loved about her husband, where her favorite spot in her house was, the neatest places she’d traveled to…

But not all of us are award-winning writers. Or even writers—at least we certainly don’t feel like professionals. And in turn, we back away from recording our memories. News flash: YOU DON’T HAVE TO WRITE WELL TO WRITE AT ALL…. (how is that for a grammatically correct sentence?)

Here are some ideas to help jump-start the process….

Make lists! (I, for one, do this VERY well…). If you don’t feel confident in using paragraphs, make a list of memories, emotions, or even places you went to on your last vacation. Sort of like a “Mastercard” commercial, paired with a photo, your simple list can become just the right amount of ‘spark’ to remember the details.

Take the photos LATER! Write about something first—a memory, a special item, a loved one—and then try to snap a photo that matches the sentiment expressed in your writing. No one says photos always have to be the first prompt…try making words a prompt for your pictures!

Take the photos FIRST! And then sit down to write, remembering just one or even a variety of things about what is happening in the photo. Little is more annoying to me than scrapbookers who put pre-formed words on lovingly-crafted photo pages. Words like “cute” paired with a photo of a baby. Or words like “play” paired with their children on the playground. Because DUH!!! The baby IS CUTE—we all know that. And the children ARE PLAYING—quite obvious, thank you. If my mother handed me a book of my childhood photos with only silly words on them like “grow” & “learn” & “play”, it would mean nothing more to me than if she would have handed me a stack of photos. We need words—simple, complex, in full sentences, or in little pieces. Show a piece of yourself. And when you take the time to document the memories through photos, take an extra 5 or 50 minutes to write something (anything!) MEANINGFUL about them as well.

So you might be thinking: But what if I can’t remember what is IN the photo? NO PROBLEM. Likely, you’ll remember something—even the smells—of the picture. Take this scrapbook page, for example.

early years: 445 Greenbrook
I knew that I lived in this house during first & second grade. But this photo was snapped on any regular day after school—playing with the neighborhood kids. And because it was in my possession (& not my mother’s), I couldn’t remember the details. So I wrote about it anyways…

“I remember the tile landing right when you walked through the door. I remember the big blue bathtub I was proud to call my own. I remember the kitchen, the glass dining table, & the quarters that always sat by the washing machine. I remember the back porch where I’d clean my hamster’s cage each week with 409 Disinfectant Spray…”

See? A list of memories—in paragraph form…brought together to explain a picture having nothing to do with little 7-year-old me in the middle of the street at our old house. But it works. And suddenly, instead of a photo of a seemingly-cold little girl, we have a story…it comes to life.

Another method is to write a letter to the person in your photos. Even if that person is unknown or a distant ancestor, you DO have something to say to them. Questions, maybe; about who they were, about their daily lives, and about how you maybe aren’t so different from them afterall. You’d be surprised how powerful letters to pictures can be….

I’d encourage you to flip through your photos. And similar to my notecards in my {insane} organization system for already-printed photos still-to-be-scrapbooked, grab a notecard or pad of paper & jot down whatever comes to mind about one or two photos in particular.

Resources:
here is a great link about one way to approach it your photos

Monday, March 29, 2010

13 Ways to Better Photos...Day 12 {shoot. edit. ACTION}

No, no. Not those kind of actions (although I’ve been dreaming of them for quite some time now!). I’m talking about doing something with all those photos. Since I waved goodbye (for the most part) to scrapbooking, I’ve had to entirely re-think WHY I’m taking pictures. And the truth is that my motivation behind the lens hasn’t changed much.

I take pictures to tell my story. I take pictures to capture moments, memories, & mishaps. And I take pictures to show that I was there, that I did that, that I experienced it. Because sometimes I’m the one that needs the most reminding.

The options are truly endless. I’m a paper-and-pen girl, a black-and-white girl, a girl who likes to tangibly hold things & hug things. So the idea of putting all my photos on a DVD just doesn’t appeal to me. Not right now…& probably never will (unless for some specific purpose). And perhaps that is the reason I’ve stuck with photos & haven’t yet ventured into the world of video—I want something to hold, to look at, to pick up & ponder. A DVD just doesn’t do the trick.

At the end of last summer, I made an executive decision: I would start making photo books. Digital photo books. We’d tried a few different websites before…& when those gems came happily packaged from Blurb, I knew that they weren’t joking around. THE BOOKS WERE AMAZING.

I ordered three photo books: yearly collections of our favorite photos from 2006, 2007, & 2008. They are full of smiling people, happy faces, birthday, autumn leaves, flowers, & travels. In the same way Project 365 showcases everyday of life for one year, these little “mini books” showcase the highlights of our lives. I purposely ordered them small—tiny enough to sit on a coffee table & be thumbed through by us, our guests, & the dust-mites I can never seem to stay on top of.
Blurbphotobooks.001
Blurbphotobooks.002
Blurbphotobooks.003

I’ve also picked sizes for our travels & yet another size for our “everyday-let’s-tell-our-story-this-way-instead-of-scrapbooks” photobooks. AND I AM SO EXCITED about making more of them! {hint! Christmas present idea! Mom…are you paying attention??}

Blurbphotobooks.collage

We’ve got a LOT of catching up to do for BOTH of our 25 years of life captured by photographs, BUT having these books (especially the “Favorite Photos”) in a small, handle-able size makes them much more friendly to look at without flipping through those giant scrapbooks.

What will I do with all the memorabilia? The coasters & ticket stubs & programs & pins & other paraphernalia? Well…I haven’t quite figured that out yet. And it will be a work-in-progress. [suggestions are welcome!] Most likely, I’ll take photos of what I can—I don’t need to keep a ticket stub if I can take a photo of it & include it in my photo book. And all the artwork that our mom’s carefully preserved from our childhoods will also be photographed & made into little books just like these. But I’ll keep a few of my favorite scrapbooks around (along with my army of supplies) to save those things that can’t quite be captured in a photograph.

So…DO SOMETHING [like her!] with those photos you’ve already invested so much in! Whether it is in digital photo books, in framed (edited!) photos, or in photographs taped to your walls, the memories are meant to be seen, remembered. Give yourself the pleasure of re-experiencing your days.

Online Photobook Resources:
Blurb (my favorite offer from Blurb is their matte wrapped covers—no chance for ripped dustjackets here!)
MyPublisher
Photoworks
Shutterfly
Picaboo

Inspiration:
Ali Edwards
"Get Creative with Photos"
"A Family's Treasure"

In your home:

sizewall
img_0730_2
Polaroid display

This post is part of a photography series...
Day 1 {angle}
Day 2 {the golden rule}
Day 3 {composition}
Day 4 {lighting}
Day 5 {perspective}
Day 6 {details}
Day 7 {focus}
Day 8 {camera talk}
Day 9 {documentation}

Friday, March 26, 2010

13 Ways to Better Photos...Day 11 {editing}

Aside from the rule of thirds, composition, & telling your story, my opinion boasts that photo touch-ups are the fourth “key” to better photos. No, not this kind of “touch-up”:
…just a little light enhancement, a little contrast, & a little cropping can make a HUGE difference in the finished product. And I promise…it’ll be a LOT better to look at.

Let’s look at some examples.
day 11 katiefamily.030 RAW
This is Katie & Shaun. Pretty decent picture, right? Composition is there. My angle was decent (they were seated, I was standing directly above them on my tippy-toes). The rule of thirds is in play (can you spot the landmarks?). And the lighting isn’t an eye-sore. But look what happens when I lighten the photo just a little bit, add a bit of contrast, & play with my RGB color curves…
day 11 katiefamily.030
See the difference? Pretty amazing, huh?

Now, before we go any further, I need to make an announcement: I DO NOT OWN PHOTOSHOP. Editing programs with full capacity (like full, professional capacity) are EX.PEN.SIVE. Like please-plant-a-money-tree-in-my-backyard expensive. Which is why Photoshop has not graced our desk (yet). Good news, though. LOTS of free resources are available that will give you almost-as-good results!

For ALL of my photos, I use a basic editing program that came with my camera. It allows me to lighten the photos, play with the contrast, & use RGB color curves to enhance the photos. The “curves” (as they are commonly called) are a great, easy way to edit pictures—although not all “basic” programs have that feature.

Here is a photo of Joelle, taken in less-than-ideal lighting. I edited it using my “free-came-with-my-camera” programs (including editing with “curves”).
day 11 jbpritchard.006 RAW
And here is the same photo AFTER editing:
day 11 jbpritchard.006b
(tip: with less-than-ideal lighting, a trick-of-the-trade is to convert your photos to black & white. You won’t notice the yellow tint or extra glare…AND they take on a much more classic look!).

After taking pictures for only a couple of years with my semi-“fancy” camera, I learned that shooting photos in RAW format COMPLETELY changes what you can do with the pictures! IT IS AMAZING! Now, not all point-and-shoot’s have this feature…but if your camera does, bust out that manual & learn how to do it! You’ll never go back! Let’s take a look, shall we?

This is Karly. She was on a family shoot I did sometime back in the fall (which is still yet-to-be-blogged). I was taking individual photos of all the kids…& forgot to change my manual settings when I snapped this photo.
day 11 nelson.112 RAW
See the yellow tint? See how over-exposed it is? YUCK.

So…because the photo was shot in RAW (instead of plain ol’ jpg), I was able to literally change my manual settings AFTER THE FACT. And this is what we ended up with!....
day 11 nelson.112
Although the final-finish of this photo is a little “green” for my liking, it is a vast improvement from the first, yes?

Among the free photo resources available on the internet, Picnik remains one of my favorites. In fact, I use it to do my “final edits” for my clients (that is, until Photoshop comes to live with us). And it isn’t perfect. It takes a LONG time for such large photos. But for now, it works. I’m all about work-with-what-you-have….and this site does the trick!

This is Alyssa.
day 11 alyssa006 RAW
Decent photo, right? (beautiful girl, yes?)

This is Alyssa after my free came-with-my-camera basic editing.
day 11 alyssa006

This is Alyssa after playing with the same photo above in Picnik…
day 11 alyssa006.o
(“Orton” at about 75%)
day 11 alyssa006.cp
(“Cross Process” at about 75%)
day 11 alyssa006.s
(“Sepia” at 100%)

See what a difference it makes? HUGE!

So take the time to edit your photos. I PROMISE you’ll love them more in the end. And take the EXTRA time to edit those make-my-heart-melt favorites—make them really frame-worthy with that extra 15 minutes spent on the computer. EVERY professional photography takes time post-processing (a fancy term for perfecting your already-shot-photos on the computer). You won’t regret it.

Other resources:
To make photo collages (like this!): Big Huge Labs, (trial version) Microsoft Digital Image Suite

Other great editing resources & examples:
Another great example of one photo i'm totally jealous of...

Thursday, February 11, 2010

13 Ways to Better Photos...DAY 10 {photograph-ese}

Remember when I mentioned camera-ese? Yeah. With reading & learning & researching, I still don’t understand it.

And I’m okay with that.

I know just enough about my manual settings to get by. And half the time I have no idea what I’m doing—pretending I do works pretty well (shhh!! Don’t tell anyone, okay?!) There are LOTS of big words floating around: aperature, f-stop, ISO, shutter speed, tilt angle, blah blah blah.

DO NOT GET OVERWHELMED!

For the first little while, master those details. I look back on some of my first photos & wonder WHO in the world would have paid me to take them. I’m still growing. Still changing. Still learning.

I hope I always am, actually.

Resources: Pioneer Woman, Shutter Sisters, Photojojo, Jessica Kettle Q&A


This post is part of a photography series...
Day 1 {angle}
Day 2 {the golden rule}
Day 3 {composition}
Day 4 {lighting}
Day 5 {perspective}
Day 6 {details}
Day 7 {focus}
Day 8 {camera talk}
Day 9 {documentation}

Monday, February 08, 2010

13 Ways to Better Photos...DAY 9 {documentation}

Not too long ago, I decided that scrapbooking was more likely-than-not a thing of the past for me. I love the pretty paper, I love the glue & scissors that go along with it. But after some serious soul-searching (did you even know you could do that in relation to scrapbooking?) I realized that I was doing it for the wrong reasons. My original intent was to create memory books for friends, family, & ourselves to enjoy. I didn’t want to be wasteful. I didn’t want to have to built on an addition to our home after 20 years of marriage to house all the Family Albums. And I didn’t want to be so paranoid about losing all that precious time. Our friends & family didn’t once pick up the scrapbooks. We rarely thumbed through them because of their bulk. And so I decided that my motives were wrong…& that digital photo books were taking the place of all that craftiness.

And you know what? I haven’t looked back.

Because I am still writing about those photos. I’m still scrapbooking some things. And if you take some time in blogland to find tidbits of amazing inspiration, you’ll quickly find that there are plenty of opportunities to document without fancy paper & expensive glue.

Photography plays a key part in recording the Days of Our Lives…well, YOUR life at least.


christmas book: title page

Last year I put together a Christmas Scrapbook that will be added to year-after-year. I’m excited for a few reasons:

**We will get this album out each year with our Christmas decorations—it won’t be something we look through all year.
**The album is small enough to sit on our coffee table.
**It is basic & easy to put together.
**It is a perfect way to hold our yearly Christmas card + record memories specific to each Christmas.

christmas book: 2006


Guest book: outside

Around the same time, I also put together a photo-guest book. My parents originally started this concept at their rental house--& it is HILARIOUS to look back on years of Polaroids & accompanying notes. This format is a bit more streamlined…but as Jon & I continue to move, grow, & house our favorite people for short snippets of time, what better way to keep track of who we’ve been able to share our home with!!?

home book: guest page double spread


home book double spread (edited)

Using the same background (a tree, for example) & getting seasonal shots of your backyard, your family, your child is a great way to document time passing.

These parents got creative—I would LOVE to have similar photos of us when we were growing.


And here is a slightly more manageable version: plop your kid (or spouse if you’d like to see how they’ve aged) in the same chair for the first few years of their lives.

This is another detail-oriented photo-op. By not including the kids’ faces, this photographer captures a different kind of photo. Notice how, without the face, you tend to focus on the details?

Not so good with words? Try this photo book idea...how awesome to get one of these each year for a birthday from a collaboration of family members!!

So get creative. Your photos don’t have to be boring. Or repetitious.

The possibilities truly ARE endless.


This post is part of a photography series...
Day 1 {angle}
Day 2 {the golden rule}
Day 3 {composition}
Day 4 {lighting}
Day 5 {perspective}
Day 6 {details}
Day 7 {focus}
Day 8 {camera talk}

Saturday, January 30, 2010

13 Ways to Better Photos...DAY 8 {camera talk}

Gratitude makes the heart grow fonder: it’s NOT about your camera

Before you even read what I’m going to say today, take a moment & read this article. I promise you won’t regret it.


IMG_6704

I’ve gotten quite a few emails & inquiries about camera recommendations from friends & family & blogland. And I’m honored that people would even ask in the first place. But I’ll be honest: I don’t research cameras. All that camera-ese that is thrown around between photographers is literally like Greek to me.

And it is all on purpose.


mirror, out of focus


You see, at this point in our lives, photography is a hobby for us. And my hope is that our hobby will continue to evolve, our photography will continue to improve, & our resources will continue to grow. But for now? For now I avoid looking, drooling, & researching new, better gear.

Because the article has become my mantra: I don’t NEED a better camera because IT ISN’T ABOUT MY CAMERA. It is about me. It is about Jon. It is about capturing our lives as they happen, focusing on the details, creating fun & natural photos that others can treasure. And if we happen to have fun in the process, all-the-better!

I’ve seen far too many people spend thousands of dollars on top-of-the-line cameras without a clue how to use them. And the truth is that yes, the megapixels might be higher, the ISO might be greater, the abilities of the camera might have been beamed down from the future…but YOU are the photographer & YOU make the photos.

THAT is why all those basics we’ve been talking about are so important to grasp: they are literally the foundation of your photos. You can take amazing pictures with iphones, with old film cameras, even with polaroids. No one says you have to spend $2500 to get great photos.

Almost 5 years ago, my parents bought me my first dSLR. We spent $900 at the time. And guess what? It is my current dSLR. Someday we’ll have the extra pocket change to buy fancy equipment, external flashes, extra batteries, giant memory cards, & an array of other fancy gear. But more than once, I’ve reminded myself that for me, this is about the pictures.

Our very basic no-longer-in-production Canon Digital Rebel has served us well. We have one extra 50mm lens. And I learned through these tutorials how to use the manual settings. I am certainly ready for an upgrade. But our bank account isn’t. And you know what? THAT IS AWESOME. Because in the meantime, I get to continue mastering my basic skills. I get to shoot awesome families & get creative behind the lens. I get to treasure the photos that I am able to take just because I DO have a camera.

So my one piece of advice to you is to learn to use your camera, whatever it may be, before you purchase a new one. Having a new camera will NOT guarantee better photos…learning the basic foundation of photography will.

Let me know if you are interested in the {very basic} knowledge that I pass along to those who inquire.

Resources:
this amazing photographer's camera suggestions
TIPA awards
a Q&A with one of my favorites


This post is part of a photography series...
Day 1 {angle}
Day 2 {the golden rule}
Day 3 {composition}
Day 4 {lighting}
Day 5 {perspective}
Day 6 {details}
Day 7 {focus}

Tuesday, January 26, 2010

13 Ways to Better Photos...DAY 7 {focus}

IMG_7040


I think every “photographer” (hey! That includes you!!) has to decide where their niche lies. I had a Biology professor in college who loved birds. He cried tears of joy (not. even. kidding.) one day in class when a rare, presumed-extinct type of Woodpecker was found. Me? I could care less (no offense, bird lovers).

I know plenty of photographers who prefer to take photos of scenery—people just aren’t their thing. Others tend to snap photos of life in action, taking on a more ‘photojournalist’ approach to pictures. And then there are those who want the photos to be perfect & genuinely prefer posed pictures where necks are straight & chins are poised.

And honestly? I’m not sure what category I fall into. I tend to think of myself as an “all around” photographer. But the truth is that I just like to hear the snap of the shutter. If a pretty sunset falls into my viewfinder, I’ll gladly take a picture. I notice details--& don’t have a problem snapping away. People are my favorite, but I tend to be better at photo shoots instead of the hilarities of the everyday.

We ALL have a LOT of room to improve. And part of that improvement is finding where your niche lies. In a sense, we all need to write our own “Photography Mission Statement”. As ridiculous as it sounds, having a solid idea of where you need & want to improve will help you mentally hone your skills & improve in the areas that need it the most.

Here are some suggestions:

Do you really want a photo of that statue? Decide WHAT your focus is—WHAT do you want your pictures to say? When you look back on photos from past events, what common theme runs through those you call your favorites? This doesn’t have to be a conscious thought process…you know which photos catch your eye & which ones you’d rather turn away. Once you find your focus, you’ll just get used to telling a “story” that reflects that.

IMG_7142


day 7 people shadows


What do you want to remember? For most, the primary purpose of taking pictures is to capture memories. Case in point: the mom who finds herself drowning in 5000 pictures after a 4 day trip to Disney World. I’d be willing to bet that the majority of her photo folders contain photos from trips or birthdays or important events. We tend to overwhelm our families/friends with photos of trees or mountains or weird cars or good food from our vacations—but they are most interested in US! After all, they aren’t “friends” with our houses or our “stuff”—they are friends with PEOPLE! So focus on the PEOPLE, wherever you are!

IMG_6980


What will you most likely forget? Remember those details…& get in on the angle! You’ll be able to get creative…here are some ideas:

IMG_7135b


Use reflective surfaces: this is a great way to get yourself in the photo while also capturing the hustle & bustle (or quiet solitude) of the city you are traveling to…it is also a great way for people to see what you do during the day!

day 7 people reflective surface & place


day 7 people refelective surfaces


day 7 people reflective surfaces to show WHERE


Use the timer on your camera…want to be in the photo too?

day 7 people self timer 1


day 7 people self timer 2


Use the light to your advantage.
Capture life in action.


…stay tuned for more…

Resources: read this


This post is part of a photography series...
Day 1 {angle}
Day 2 {the golden rule}
Day 3 {composition}
Day 4 {lighting}
Day 5 {perspective}

Day 6 {details}

Saturday, January 23, 2010

13 Ways to Better Photos...DAY 6 {details}

day 6 details celebration detail


So I’ve driven this point into the ground: let your photos tell a story.

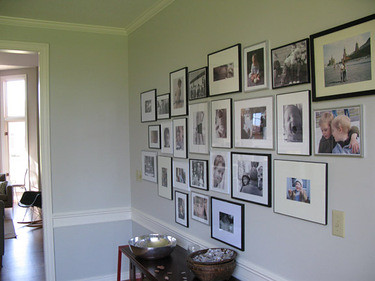
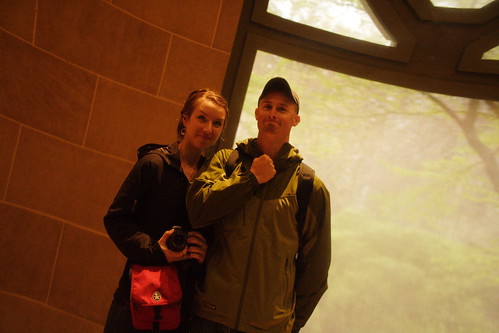
What does this photo tell you?

wwII.001

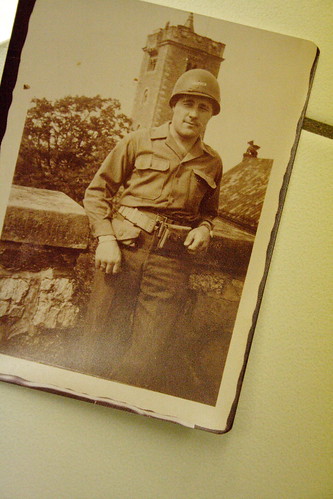
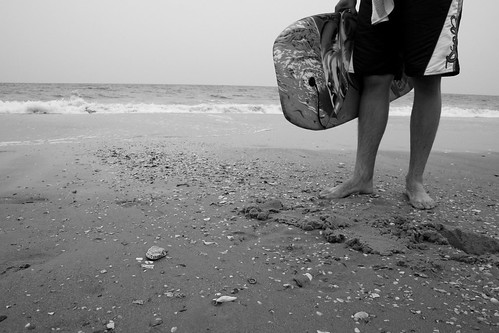
It tells me enough that I can make up a story about it with the few details that I know. It tells me about the location, the era, the age of the person. But you know what else I’d love to see?


day 6 details now a cpt rank

I’d love to see a close-up of this uniform. I’d love to see what shoes he was wearing—how dirty they were. I’d love to see what his hands looked like…what car brought him to this location…what the bricks on that building looked like up close. Maybe I’m a bit over-the-top when it comes to details…but I’ve noticed something…

day 6 details now a cpt

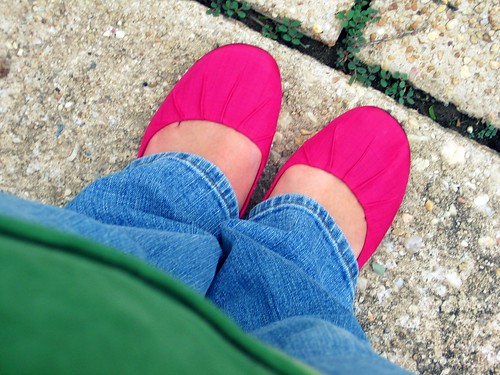
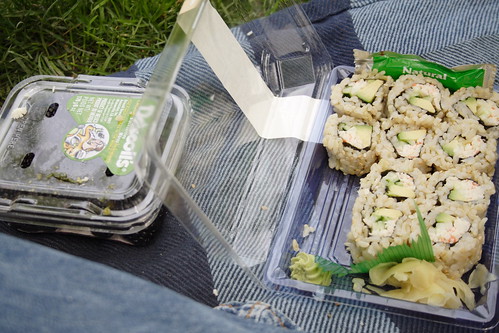
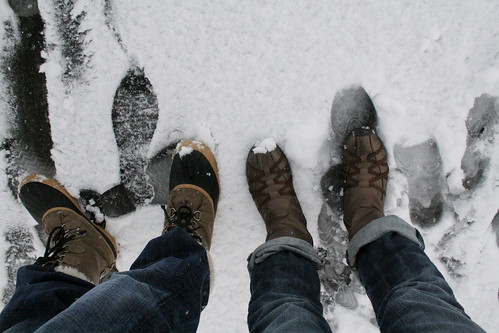
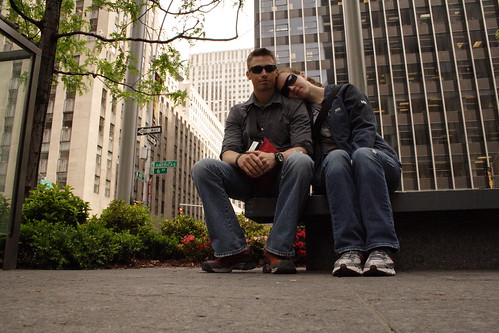
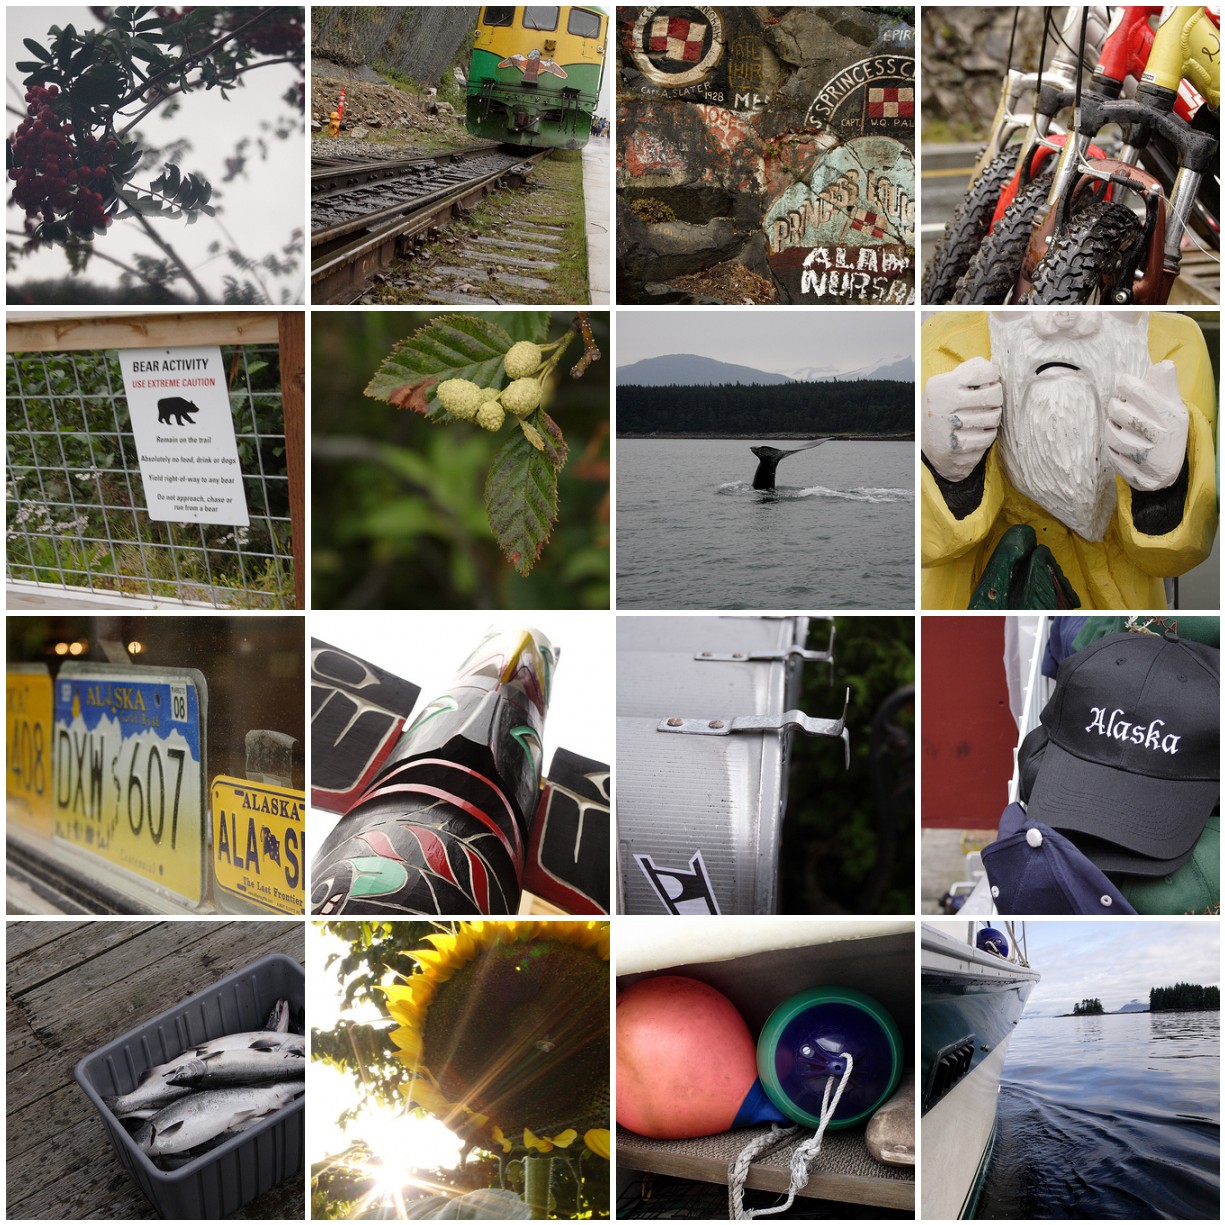
I’ve noticed that when we take vacations, I DO tend to focus on the details. I take pictures that most people would think are quite weird. Like our shoes. And the sidewalk. And the food we eat. And the pillows on the hotel room bed. And even at home I take pictures of the toilet paper. And the dirt Jon tracks in the house on his boots.

IMG_6308


IMG_1487


IMG_1482


our monthly stock of onions & potatoes


jon practicing guitar by computer-light

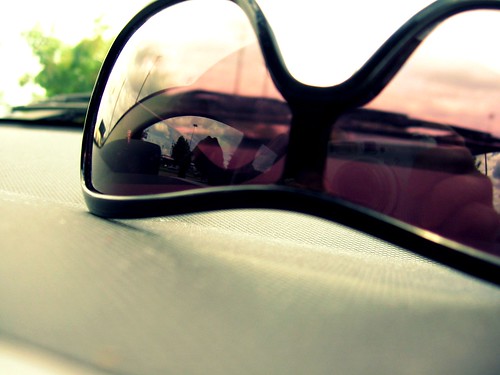
WHY? Because all of these things MEAN SOMETHING. they mean more than a picture of a skyscraper. They mean more than a photo of faces, sometimes too. That old saying “The beauty is in the details” is really true for photography. And focusing on them highlights the little wonders of the World…Wonders of YOUR World—the ones important in your life. And the ones that we tend to pass over every day without a second glance.

day 6 details celebration details focus on the THING instead of the person

For some reason, having that camera in hand makes all the difference.

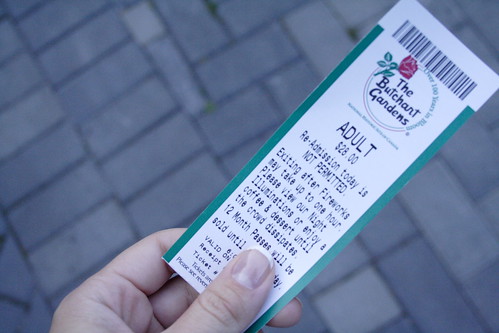
On a trip? This is a PRIME opportunity to experiment taking photos of things you normally wouldn’t: the bed when you get up in the hotel each morning, the coffee you drank for breakfast, the fabulous cupcake you had for dessert, what you did in your spare time…

lombardi's pizza, NYC


day 6 details on a trip 3


day 6 details on a trip 2


day 6 details on a trip


day 6 details trip


day 6 details event-fishing


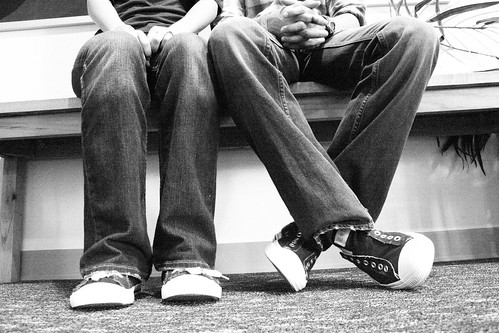
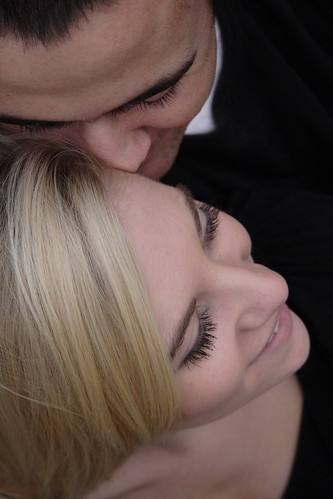
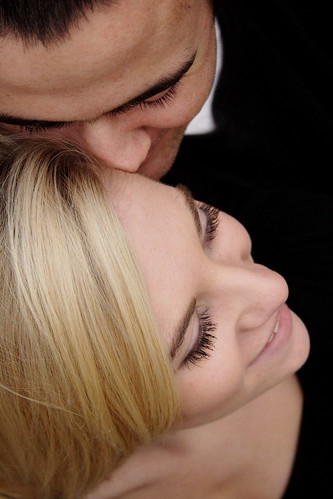
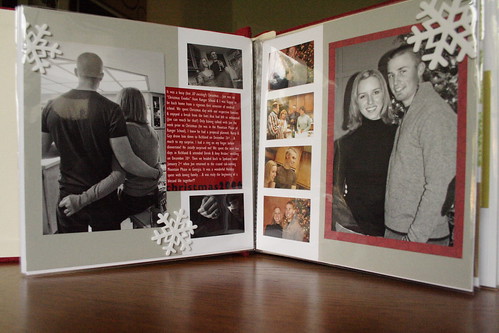
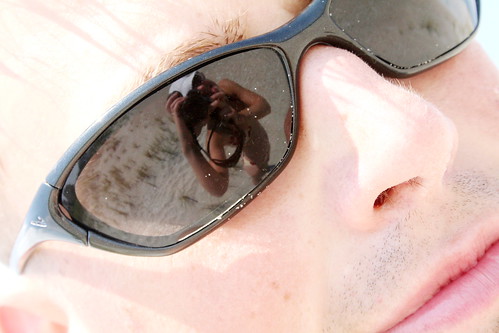
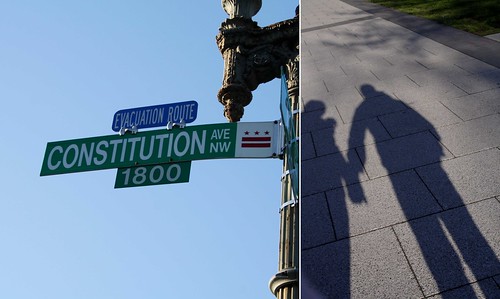
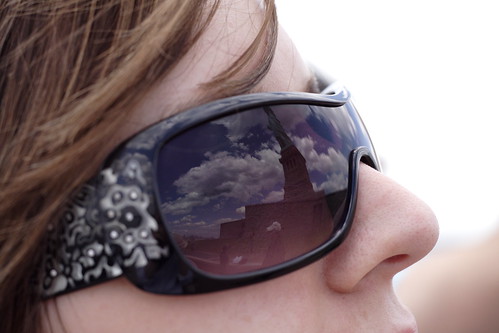
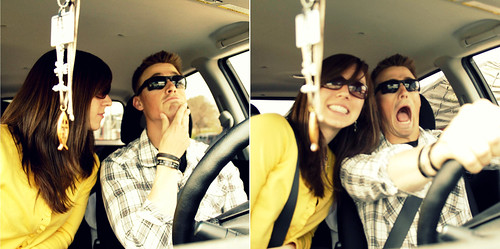
On a date? Use your self-timer! Find reflective surfaces to get both of you in the photo. Take pictures of you holding hands. Take pictures of your dinner, your shoes, of the restaurant.

day 6 details reflection 1


day 6 details place taking a break


08.22.09008


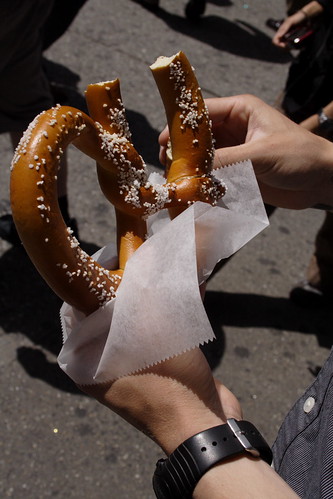
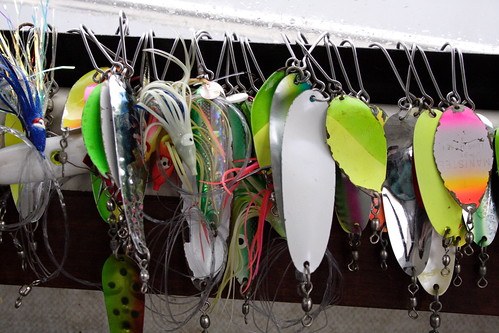
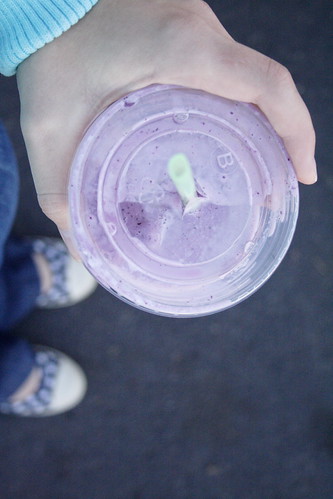
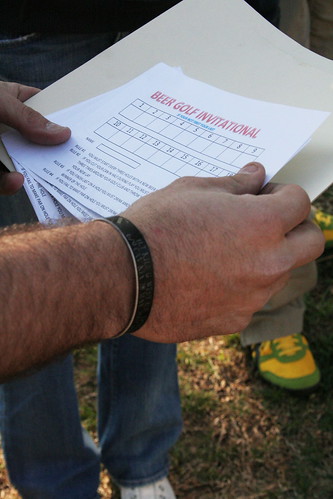
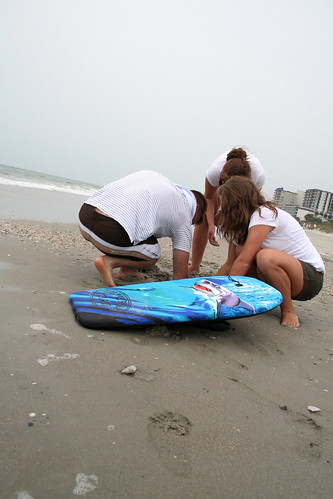
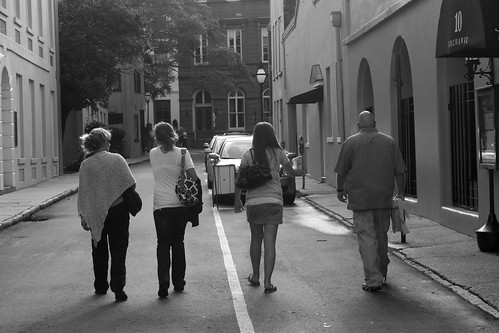
On a walk? What a great opportunity to notice the little details within just blocks of your house! Take pictures of what you carried, the street you walked on, even the texture of the ground: dirt? Cement? Rocks?

day 6 details surface snow


day 6 details it was snowing


day 6 details surface & event


day 6 details surface & activity

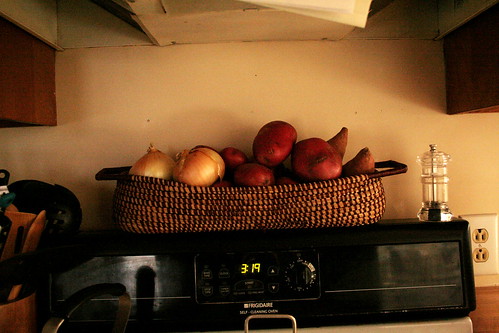
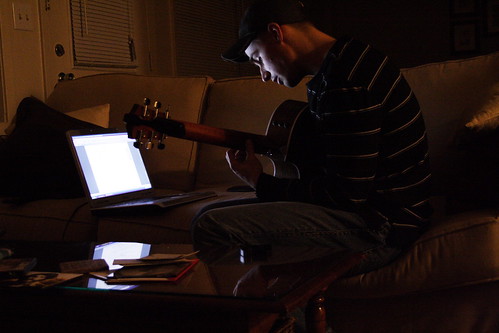
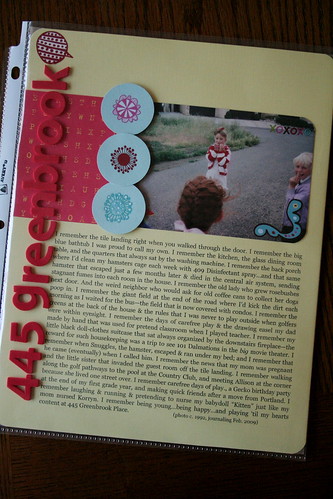
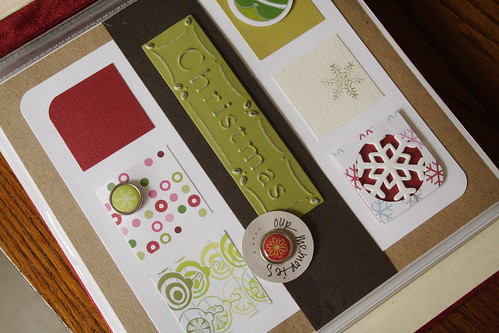
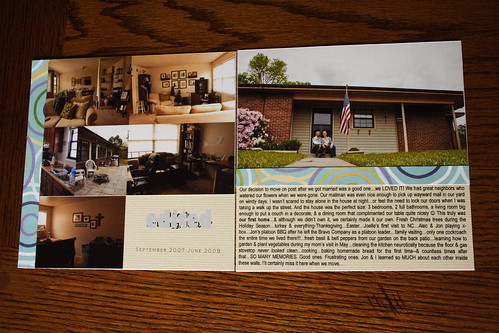
At home? What little details of your house, corners of your home, or memory-provoking-items have you not photographed &/or written about?

day 6 details place i was sick


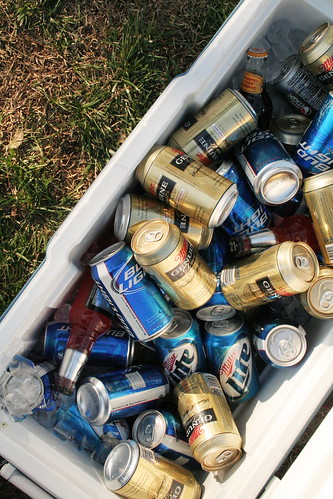
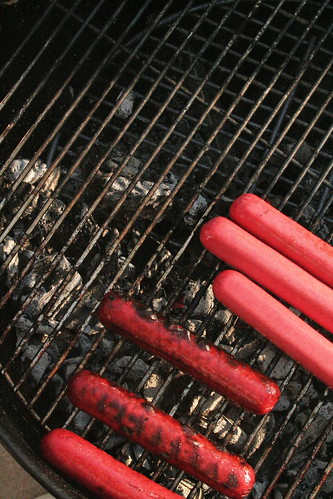
At a BBQ? The possibilities are endless…

day 6 details bbq people


day 6 details bbq drinks


day 6 details bbq grill


day 6 details bbq games


The concept of “Project 365” was not my idea. But I quickly jumped on the bandwagon when I knew that Jon & I would, literally, miss a YEAR of each other’s lives. I wanted him to see (via this blog) that I was okay. And I wanted to share in the somewhat mundane of my everyday with him—since he wouldn’t be here to experience it alongside me. Although the ‘work’ of remembering to take a photo everyday is much easier because I’m doing it for something (i.e., Jon!), it is the concept behind it that I fell in love with: documenting the everyday.

I would so treasure photos of what my great-Grandmother did everyday of her life. Did she quilt? Journal? What books did she read? What did her closet look like? Did she keep flowers in her house? And what did the inside of her home look like?

Long ago, I talked myself out of taking photos for future generations. I know many people do, but I don’t want to be so attached to the ‘responsibility’ of documenting my life for our future family members...not to mention the fact that I don't even know if they will care. So I promised myself that 
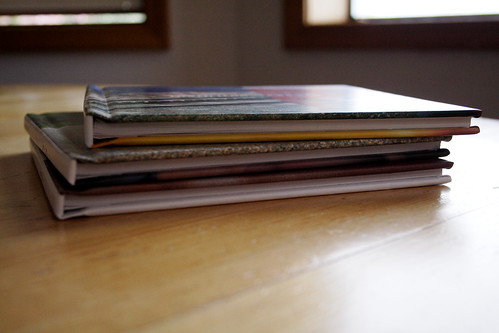
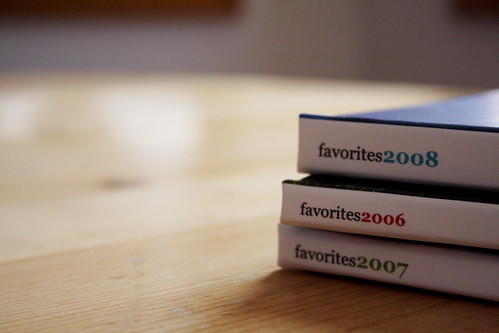
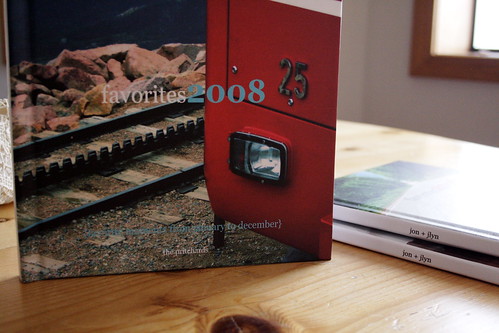
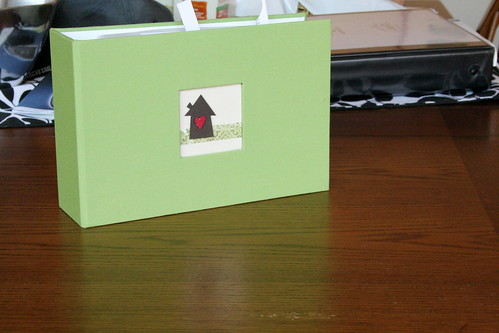
all this picture-taking would just be for US. that’s it! and I know that at the end of this year when I print a photobook of the 365 days that Jon & I were apart, I’ll rest well knowing that anytime he wants to, he can open the book & know what quirky things filled my days when he couldn’t share them with me.

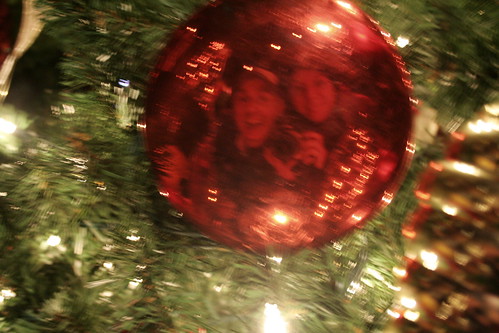
Pictures have the incredible ability to evoke strong memories. Those “Kodak Moments” (& well, the Kodak commercials sometimes) have the ability to draw out emotion in a unique way. What better way to remember things than through photos. So don’t ignore the mundane. Don’t pass by the seemingly boring. Take the opportunity to look through that viewfinder…& soon enough you’ll be seeing life in a series of pictures. And when you decide to snap the shutter, remember that you are doing more than taking a photo—you are (as cliché as it sounds) freezing memories in time.


This post is part of a photography series...
Day 1 {angle}
Day 2 {the golden rule}
Day 3 {composition}
Day 4 {lighting}
Day 5 {perspective}

Related Posts Widget for Blogs by LinkWithin