
13 Ways to Better Photos...DAY 2 {the golden rule}
If you learn NOTHING ELSE over the next few weeks, LEARN THIS. Seriously. It will absolutely change your photos.
Take a look at this photo. Nice, right?
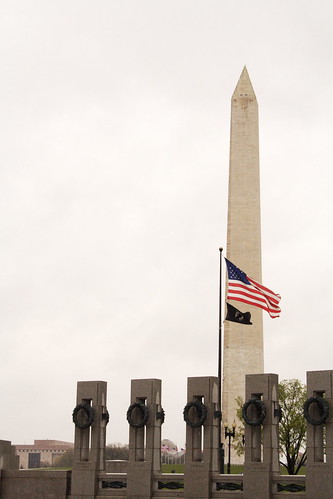
The rule is the RULE OF THIRDS. And, in my humble opinion, is the most important rule to making your photos look fabulous & your subjects look, well, fabulous.
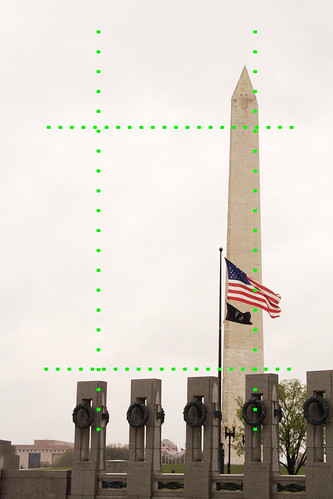
{What do you notice about this photo? See how the lines--the "thirds"--perfectly divide up the objects in the picture? The National Monument is in the right third of the photo...the WWII Memorial is in the lower third of the photo. Not only does their placement allow a "beginning (the WWII Memorial), a middle, and an end (the National Monument)", it also makes the photo much more visually appealing...}
Let’s look at a few examples…

{do you see where the "Rule" might fit here? Divide the photo into vertical & horizontal thirds...see how each "dominant" piece fits (jon's sunglasses...Max's nose...)?}

{those pretty green stars are the dividers...and you are right...jon's sunglasses (which stand out on their own) were placed in the upper third of the photo...& Max's giant nose in the lower third. This makes the photo balanced. What else do you notice? If you answered the tightly cropped frame, you'd be right! The photo was taken in the car...& despite not having much room, the background visual "noise" of other cars on the street would only have detracted from the subjects in this picture.}

{Do you see the rule applied here? Nothing says something has to be placed in every "third" of the photo--but instead of the building taking up 1/2 of the photo, the Rule of Thirds applied allows a balanced, asymmetrical photo that is more visually interesting than one where the building fell in the middle of the picture.}
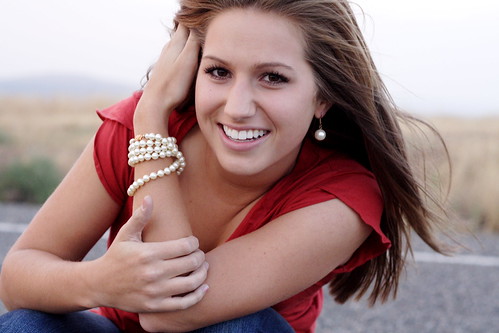
{Korryn's eyes fall in the upper third...most of her torso in the left third. Even though her face is in the middle, the continuation of her torso in the left third forces our eye to move from the middle (her face) to the third (her torso & arms). Much more visually interesting than centering her torso & having her face fall in the right third...can you figure out why?}
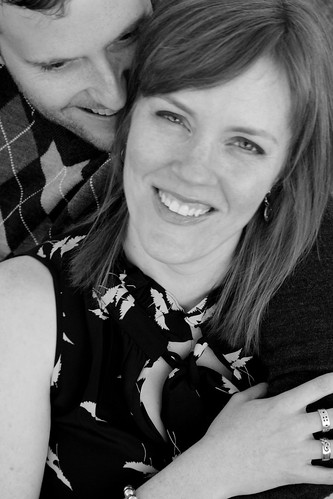
{here again, Beth is the main subject of this photo. Cleve is a secondary subject--I didn't include his whole face on purpose here. Can you find the points where the "rule" applies? Beth's eyes are the "focus" of this picture--they fall in the upper & right third of the photo. Because her eyes are the focus, nothing else in the photo really matters--it naturally falls into the "rule" because of the placement of her eyes in the viewfinder.}
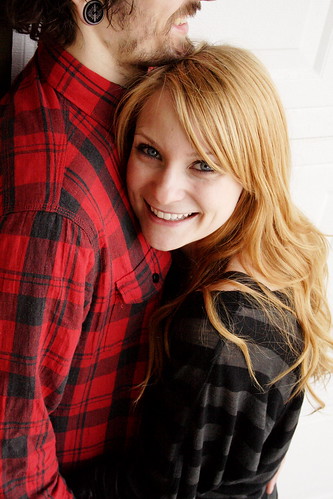
{Again, this picture follows the rule of thirds with Ketra's eyes as the "focal point" of this picture. Andrew is, once again, a secondary subject for this particular shot.}
Once you practice looking through the viewfinder, following the rule of thirds, it will become second nature. So no, I don’t consciously *think* about this rule each time I take a photo—that would take FAR too long. Instead, I realize that my favorite photos--& those that are most visually appealing—are ones that follow this rule.
AND remember, this rule applies to ALL photos--not just photos of people or portrait sessions, but ALL photos! Landscape photos, scenery, detail shots, everything! For the next 11 tips, pay attention to the rule in EVERY photo. Once you start to notice it, try to incorporate it into your own pictures...i PROMISE they'll get better!!
…and I’m willing to bet if you look at YOUR favorite photos or those you most like looking at, they’ll follow this rule too.
This post is part of a photography series...
Day 1 {angle}


1 comment:
Love it again!
Post a Comment